Christmas Lights with Raspberry Pi
I finally caught the bug. After seeing a neighbor choreograph his entire outdoor light display with music, I set about trying to figure out how to do something similar. I’m starting small, just trying to automate 6-8 different sets of lights on a tree, but you never know where this will end.
After a quick google search, I stumbled upon this article on by Osprey22 on Instructables Raspberry Pi Christmas Tree Light Show
I bought some gear to get started:

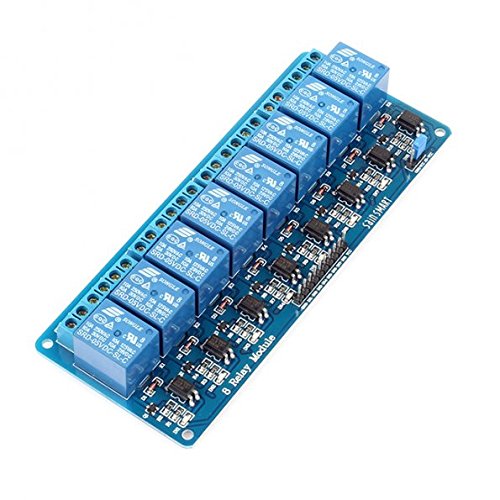
SainSmart 8-Channel Relay Module - this is used to turn power on and off to the individual power outlets
CanaKit Raspberry Pi 2 Complete Starter Kit with WiFi - to get me started easily
I hooked them up to a wireless keyboard/mouse and a monitor (using a HDMI cable), popped the SD card into the Raspberry Pi (RaPi) and installed Raspian operating system using the NOOBS installer. This already cam installed on the SD card, but you can also visit the Raspberry Pi NOOBS Setup page to learn how to do this yourself
Next I started following the instructions in the Instructables article
Static IP Address
I setup a static IP address by right-clicking on my wifi connection and selecting WiFi Networks (dhcpcdui) Settings. Select interface and wlan0 and set the IP address and Router number
Install Telnet
Next, I installed telnet:
sudo apt-get install telnetd
sudo /etc/init.d/openbsd-inetd restart
Verify the telnet by opening a command prompt:
netstat -a | grep telnet
You should only see something like this:
tcp 0 0 *:telnet *:* LISTEN
but once you connect to it from another machine using telnet, you’ll see something like:
tcp 0 0 *:telnet *:* LISTEN
tcp 0 0 raspberrypi.loca:telnet 192.168.15.161:49610 ESTABLISHED
Finally, if you want to restrict who can login:
sudo nano /etc/hosts.allow
and add lines similar to these at the bottom of the file:
in.telnetd : 192.168.1.161 : allow
in.telnetd : 192.168.15. : deny
Save and restart the service:
sudo /etc/init.d/openbsd-inetd restart
FTP Services
Next, I installed an FTP Server
sudo apt-get update
sudo apt-get upgrade
sudo apt-get install vsftpd
Let’s see if it’s installed
netstat -npl|grep vsftpd
tcp6   0      0 :::21           :::*            LISTEN      1984/vsftpd
That’s it. If you want to configure the service (like add security features) check out the article linked above.
Install PyGame
To write scripts to play audio, install pygame for Python 3. I also referenced this article
sudo apt-get install mercurial
hg clone https://bitbucket.org/pygame/pygame
cd pygame

sudo apt-get install libsdl-dev libsdl-image1.2-dev libsdl-mixer1.2-dev libsdl-ttf2.0-dev
sudo apt-get install libsmpeg-dev libportmidi-dev libavformat-dev libswscale-dev
sudo apt-get install python3-dev python3-numpy

python3 setup.py build
sudo python3 setup.py install
Wiring up Relay Module
This great video made it really clear about how to connect the Rasberry Pi to the SainSmart relay module. He talks about an issue he had with the Raspberry Pi 2 Model B, but I never experienced it.
Wired the board up using GPIO.Board configuration. Plugged it in and ran the basic.py test script:
python ./basic.py
and everything worked
Automatic Lightshow
I found an article by Chivalry Timbers (it could be his real name) about running a light show directly from a MIDI file. About three paragraphs in, he referenced a project called Lightshow Pi that will allow you to use a MP3 instead.
Download Lightshow Pi
# Install git (if you don't already have it)
sudo apt-get install git-core

# Clone the repository to /home/pi/lightshowpi
cd ~
git clone https://togiles@bitbucket.org/togiles/lightshowpi.git

# Grab the stable branch
cd lightshowpi
git fetch && git checkout stable
Install LightShow Pi
cd /home/pi/lightshowpi
sudo ./install.sh
The install process can take several minutes. You should reboot after the install completes:
sudo reboot
Verifying Your Hardware Configuration
You can verify your hardware setup and configuration are setup properly by blinking each channel one at a time using the following command from the main LightShow Pi directory (/home/pi/lightshowpi if you’ve followed the default install steps):
sudo python py/hardware_controller.py --state=flash
You can also fade each channel in and out using software PWM using the following command:
sudo python py/hardware_controller.py --state=fade
Press